Taking down a tent
Cleaning, dismantling and folding your tent are simple when you follow the right instructions, and perks are that you’ll have a tent that’s easy to pack into your car and well-maintained ready to accompany you on your next adventure.

Why is it important to pack away your tent properly?
If you want your tent to stand the test of time, packing it away properly is paramount. Without proper storage, your tent could wind up mouldy and stained, and the material and waterproof lining will quickly wear down.
In the worst-case scenario, you could end up with holes or tears in the fabric or seams, which will lead to a leaking tent and require special tent repairs.
How to dry your tent before packing it away
Tents that are packed away while they’re still damp are a formula for mould growth and damage, so don’t be tempted to skip these few extra steps or visit our manual on how to dry out a tent before you get started on taking down your tent.
1. Wipe away any dirt using a clean rag.
If your tent has gathered any dirt, grass or other wild substances during your camping trip, take a clean rag and wipe off the stains.
If the mud is caked on, you may need to dampen your rag a little beforehand to loosen the substance. More stubborn dirt might require soap: if so, avoid harsh detergents and use gentle hand soap mixed with water.
2. Shake your tent to shed any excess water.
A thorough shake of your tent will dispose of any excess water resting on the fabric, making it easier for you to wipe it down. Be careful not to damage any tent poles when you shake the tent; a few firm but gentle wobbles should do the trick.
3. Wipe down the surfaces with a clean cloth.
Using a clean rag or cloth, thoroughly wipe down the outside of your tent to remove any additional moisture. Don’t use a dirty rag, as this will only smear new dirt over your tent and send you back to step one.
4. Let your tent sit outside in dry weather.
Rather than skipping straight to packing your tent away, let your tent sit outside in dry weather (or ideally a sunny patch) until the fabric is dry to the touch. Depending on the weather, this can take anywhere between 20 minutes and an hour.
5. If you’re short on time, unpack your tent when you return home and follow the above steps.
If you absolutely cannot avoid packing your tent away while it’s still damp, set an alarm to take it out when you arrive home and follow the above process. It may be tempting to leave things as they are, but mould and damp will only fester as the time ticks by.
Whatever you do, don’t try to speed things up by placing your tent in front of a radiator, fire or other unnatural source of heat, as this could damage the fabric.
15 steps for taking down your tent
1. Empty your tent of all personal items, dirt and debris.
After shuttling all of your personal belongings into your bags or a car boot, give the inside of your tent a final sweep to collect any dirt or debris like twigs and stones. Use a rag or a plastic bag to wipe or transfer debris outside.
2. Thoroughly clean and dry your tent following our instructions on how to dry out a tent.
3. Remove any tent pegs from the ground.
Pull any tent pegs out of the ground, unhook or untie them from the guy lines and place them in your tent bag.
4. Dismantle your flysheet if you have one.
A flysheet is an optional fabric that covers your tent, protecting it from the elements. Carefully slide any tent poles out of the flysheet, fold them up and place them into the pole bag.

5. Clean and dry your flysheet and place it inside your tent.
Take your flysheet onto a clean surface to clean and dry it, following the same process for cleaning and drying your tent. Leave it to dry for at least 20 minutes until it’s dry to the touch. Then lay it out evenly in the centre of your tent, ready to be folded with the rest of the tent.
6. Unzip the tent doors halfway.
Air needs an opening to escape; otherwise, your tent will be impossible to dismantle. Avoid unzipping them fully, as the doors could flap in the wind or get in the way.
7. Remove the tent poles.
Gently slide out any tent poles, fold them up and deposit them in the pole bag.
8. Lay your tent out evenly.
Lay your tent evenly on the ground, ensuring that any built-in porches or other sections are tucked towards the centre. By the end, it should look like a square or a rectangle and the surface should be as flat as possible.

9. Zip up any doors or windows.
Now that your tent has been dismantled and laid out flat, zip up the doors and windows to ensure that they don’t snag your tent’s fabric.
10. Fold your tent by taking two edges to the centre of the tent.
Take two opposite edges and fold them into the centre of the tent. They should meet in the middle, forming a rectangle that’s about a quarter of the previous width.
11. Smooth the tent down using your hand to remove any excess air or creases.
Iron out any air bubbles or creases by smoothing the tent down with the palm of your hand.
12. Place the pole bag at one of the short edges.
Lay down your pole bag on top of the tent fabric and align it with one of the short edges of the rectangle.
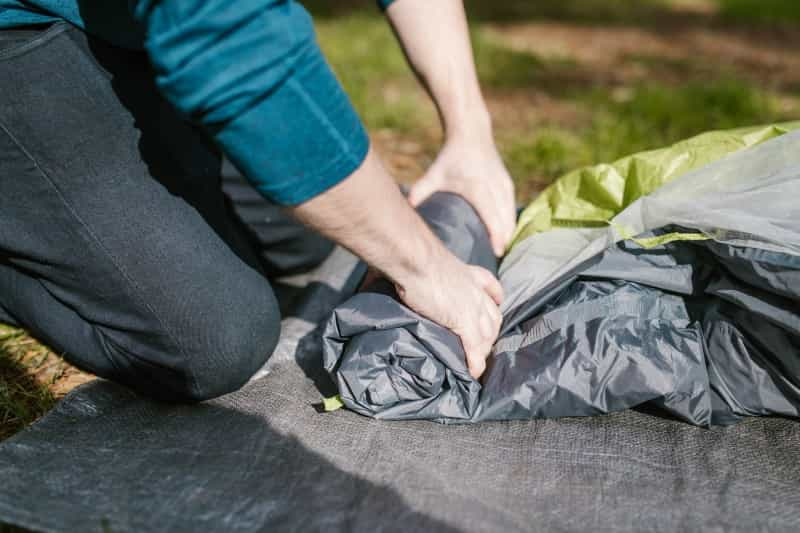
13. Roll your tent up around the pole bag.
Slowly and carefully roll your tent up, wrapping the fabric around your pole bag as you go. Roll the tent up as tightly as possible, ironing out any air with your palms so that it will fit into your tent bag later.

14. Secure your tent with elastic or ropes.
Use elastic or a small cord to tie together your freshly rolled tent and keep it in place. Your pack will usually provide some elastic, but if not, you can use a small piece of rope by forming loops at either end and threading one end through the other before securing it with a knot.
15. Store your tent in the tent bag.
Transfer the rolled-up tent to your tent bag and ensure that the bag is sealed so that no moisture can get inside; usually there will be a zip or Velcro fastenings provided.
With your tent securely packed away, you’ll be set for your next adventure. Tent care is a key part of any great camping holiday, so before you start thinking about your next destination, be sure to check out our guides to performing tent repairs, cleaning a tent and waterproofing your tent.